Showing posts with label shabby chic. Show all posts

Wednesday, May 24, 2017

spiderweb, a Halloween shadowbox...

 More Halloween art, today, with a small witchy diorama/shadowbox. Super easy to create using the Small Frame Shadowbox, mostly painting, cutting, pasting and a bit of sewing (to make a felt witches hat). The hat, or one like it, will be an upcoming kit at Alpha Stamps in mid July. So stay tuned to this blog or the Alpha Stamps blog for more information on that.
I am going to show you how to keep the glass in your shadowbox while making it open and close on command ;)
I like to have the glass there to keep the dust out and having the frame front removable, makes it reusable as a display box if you don't permanently glue the displayed pieces into the box.
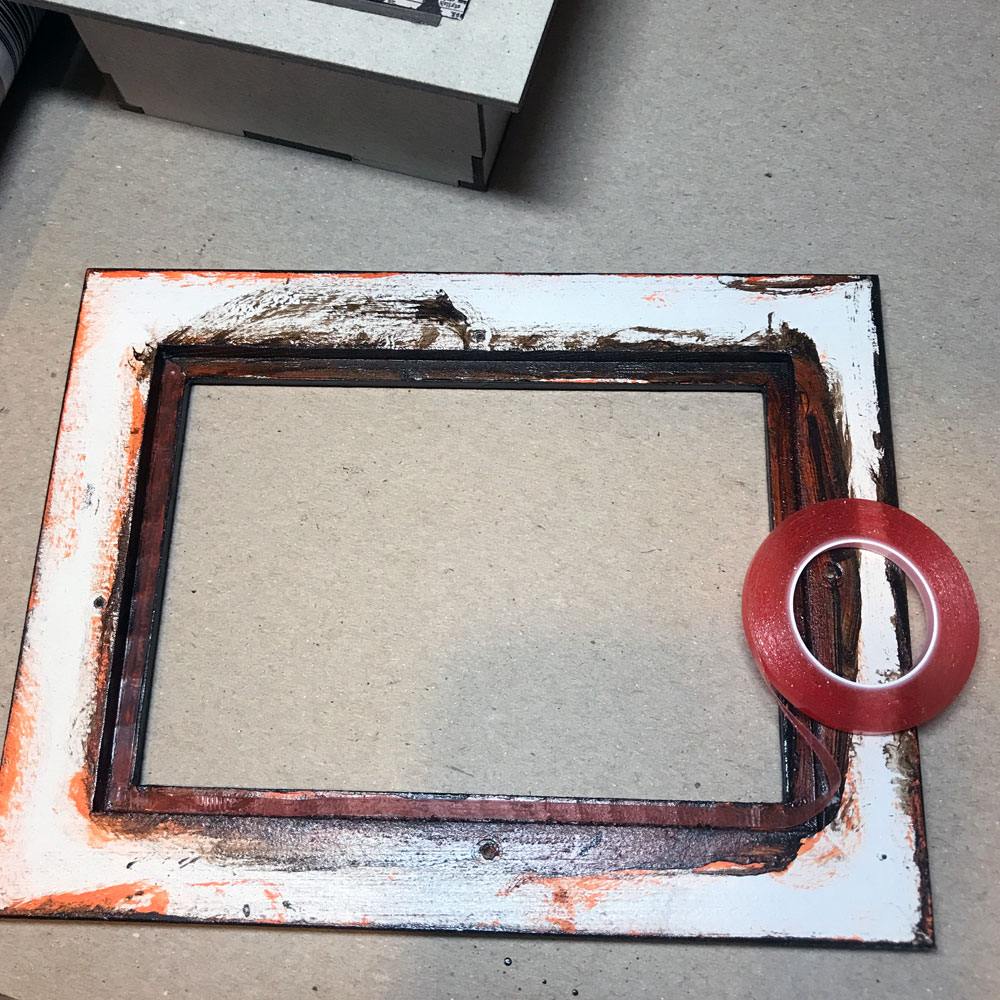
To permanently affix the glass inside the frame, I ran a strip of Super Sticky Red Liner Tape all the way around the inside ledge of the frame (where the glass usually sits). Remove the red backing, clean the glass, then adhere to the red liner tape. Simple and effective!
For a removable frame, I started by lining the frame up so it was where I wanted it to be when finished. Then I flipped it over and marked the corners with a marking pen.
 Making "L" shaped marks around all of the corners (of the shadowbox backing) is important to the placement of the "Velcro" fasteners we will use to make it removable.
 You can use any brand or color of fasteners you have on hand. I used the one below and I got it at Target.
Cut a piece of each "side" of the fasteners about 1.5" long.
 Then cut those pieces into four equal pieces as shown below.
 Apply the four "fuzzy" pieces of fastener to the four corners of the shadowbox. Then apply the four pieces of the "pointy" fastener to the "L" shaped marks we made on the back of the frame.
 Line up the fasteners facing each other and press.
The shadowbox and frame should now be firmly affixed together but with the fasteners it can be gently removed and replaced again and again :)
I hope you enjoyed this quick post and it inspires you to make your own little Halloween shadowbox. If you would like to use any of the items I used, in my shadowbox, you can find my supply list here.

Wednesday, April 26, 2017

a lady's dresser...

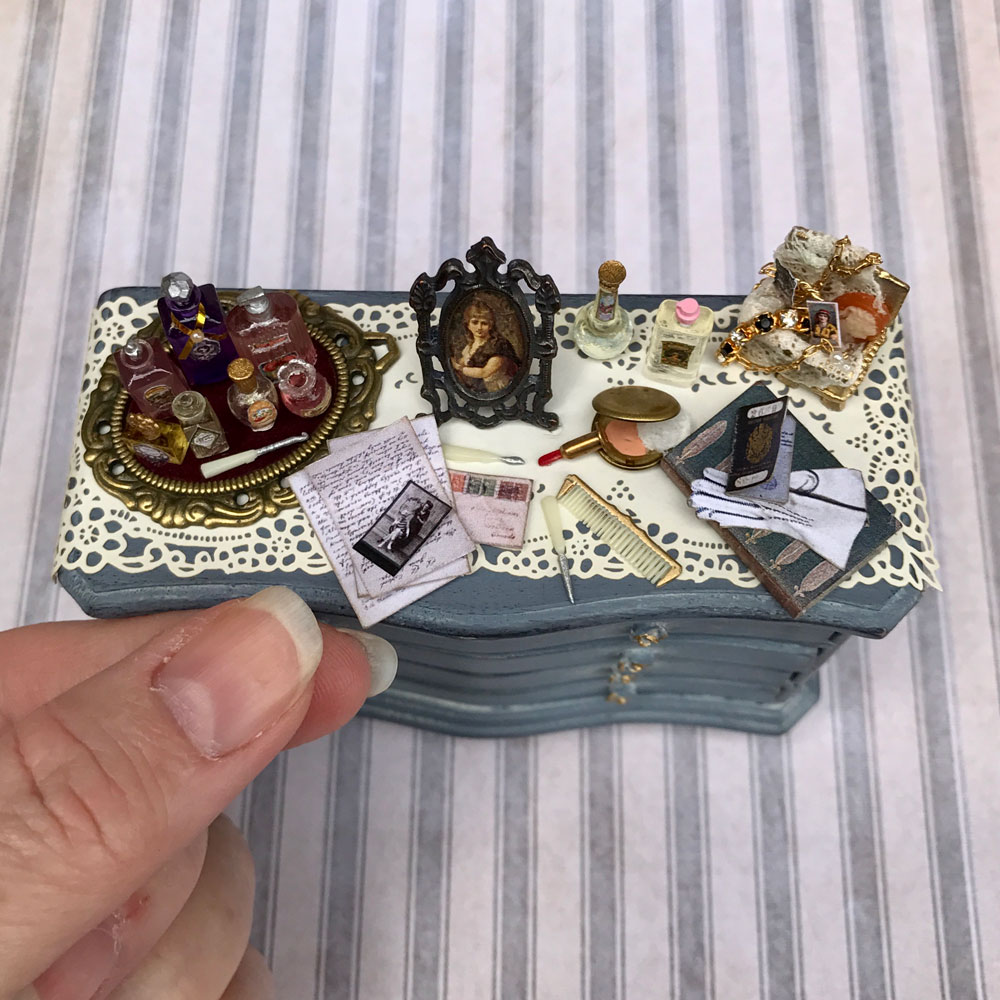
 Believe it or not, this beautiful shabby chic dresser started out as an unfinished dollhouse dresser that looked like this:
I used Folk Art Home Decor Chalk paint in Nantucket Blue and Folk Art Home Decor Wax in White to achieve the shabby chic look (I bought both at my local Jo-Ann Fabric and Craft Store). The tiny roses, I used as handles, were sculpted from polymer clay and glued on before I painted. You could probably use 6mm metal roses to get a similar look if you aren't into sculpting with clay. I dabbed a bit of metallic gold paint on to the roses so they didn't blend in with the dresser paint too much.
 When I was ready to "dress" my dresser, I glued down a Dollhouse Laser-Cut Table Runner. Then I lined the tiny drawers with some scrapbook paper I had leftover from a previous project.
Many of the elements used on this dresser came from a collage sheet I created with tiny things to use in a lady's boudoir. I cut out the tiny little perfume labels using sharp pointed scissors and a pair of tweezers. A Wax Pick-Up Pencil is great for holding the labels while applying glue and then adhering the label to the perfume bottle.
Some of my favorite items in this dresser are the tiny stack of love letters tied up with a bow in the top drawer and the little stack of matching decorative boxes. 
To create the love letters I simply cut out a bunch of the envelopes from my A Lady's Boudoir Ephemera Collage Sheet, folded and glued them, then glued them together to form a stack. I then glued a band of ribbon around them, tied a tiny bow in a matching piece of ribbon and glued it on top of the band.
Tip: I find it's often easier to use two pairs of tweezers in place of my giant fingers when tying a tiny bow. I use 2mm silk ribbon (often sold as an embroidery ribbon) as it is tiny and quite flexible.
The stack of boxes was also cut out of A Lady's Boudoir Ephemera Collage Sheet. 
 To create a stack of your own cut, fold and glue the three boxes (from the collage sheet) together. Then apply a strip of Tiny Gold Line Stripe Tape around the biggest lid and glue a perfume label over top. Next glue the lids onto the boxes then glue the boxes together. When the glue is dry glue a band of ribbon around the boxes and tie a tiny bow in a matching piece of ribbon and glue it on top of that band.
Thanks for stopping by and reading about my little dresser. If you'd like to make one of your own you can find my supply list here. 
Have a fun and creative week :)


Saturday, March 25, 2017

the memory keeper's room...

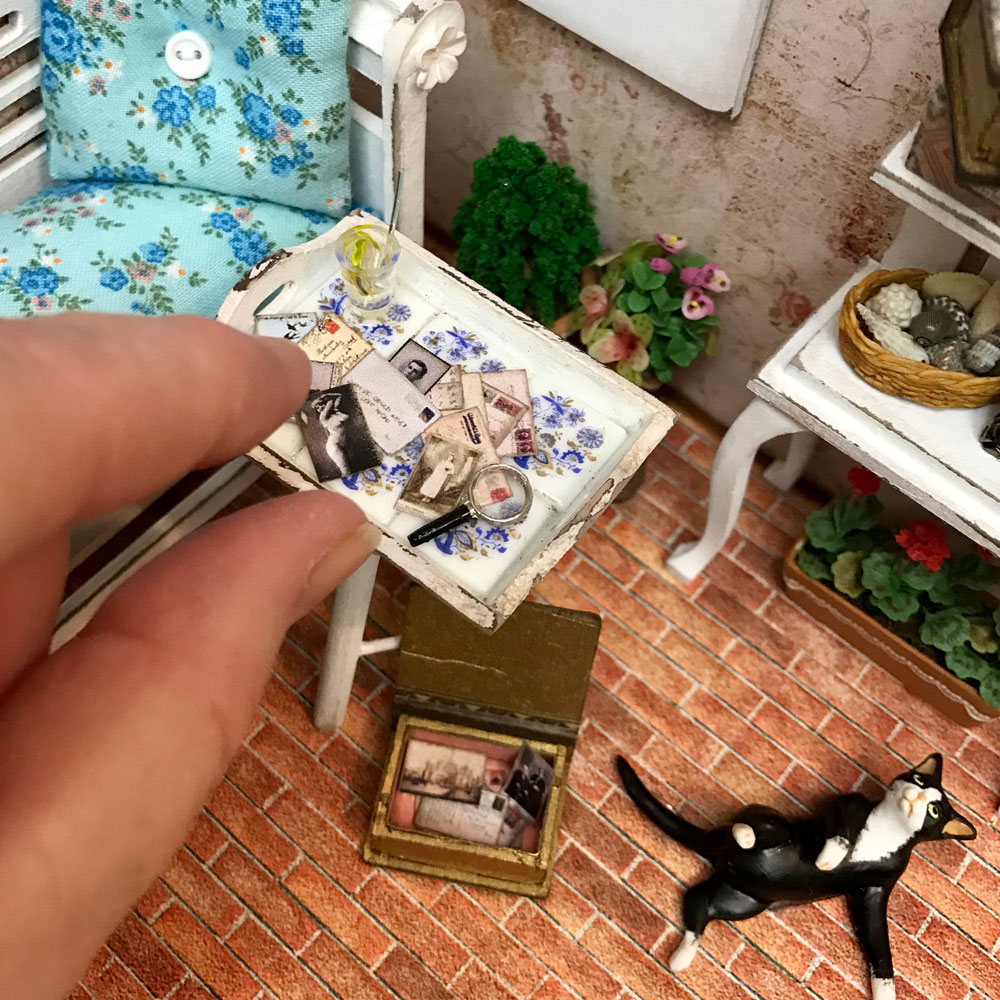
 This little shabby chic roombox is a tribute to all of you out there who collect vintage ephemera and photographs. I started collecting when I was a child because I spent a lot of time with my Great Grandmother, who was a collector. I still get a thrill when I find a particularly interesting old postcard or well worn love letter. The memories attached to these treasures may not be my own, but they still speak to me and inspire me to imagine a long past world so different from my own.
 As you can see, the focus of this room is the tray filled with old letters, postcards and photographs. There is even a magnifying glass for closer inspection. Below the tray is an open faux book box, with more photos and ephemera, waiting patiently for perusal. A couple more faux book boxes on the shelf await their turn as well.
 I felt this room really needed a window to look out of (while daydreaming) so I used a set of Dollhouse Windows with Shutters 1:12 to add one. The image I used behind the window wasn't quite tall enough to fill the whole window sooo... I made a decorative window shade out of a toothpick and some cardstock to hide it. I just glued the cardstock around the toothpick, added a piece of cardstock to the back so it hangs down and glued filigree beads to the ends. A small piece of white Dresden trim adds a finishing touch.
 I love cats, so I always try to put a cat or two (or three or four!) in any room box I make and this one is no exception. There's a mama cat and three kittens (who are really half scale cats that work purrfectly as kittens!)
I thank you for stopping by my blog and hope to see you again! Remember to take time to daydream and use your imagination :) Now run along and create something!
Supply list is available here.

Saturday, June 18, 2016

a brocante summer cottage...

Brocante is the French version of a flea market and an awesome place to find loads of sweet and unique items to furnish a summer cottage. Like most people, I don't own a summer cottage but I really wanted to decorate one with finds from the brocante, soooo... I created a 1:24 scale cottage using the new Half Scale Room Box with Slanted Roof, a Half Scale Bay Window and a Cottage Base - 9x9x1.
I really enjoyed building and furnishing this tiny cottage and I think it turned out pretty cute...
I used Sheet Moss to cover the roof (to give it a fairy garden feel) and covered it in a distressed stucco paper I found in the Provincial 6x6 Paper Pad. The flagstone patio is a 12x12" sheet of Provincial Cobblestone Scrapbook Paper. I really love that scrapbook paper companies are offering so many realistic background and architectural papers currently.
My fence was made using Mini Chipboard Gothic Fence that I dry brushed with white chalk paint and hot glued around the base.
I used a Mini String of Fairy Lights to light up my tree, and two of the new Half Scale Tulip Ceiling Lights to light up the interior of my cottage. To conceal the lighting wires I ran them under the paper I used to cover the ceiling like this:
 The area above the ceiling has a small empty space where you can put the 9v Battery Converter for Half-Scale Lights and when the roof is in place you don't see them at all.
I furnished my cottage with (new and awesome!) Half Scale Princess Love Seat, Table & Chairs Set that I painted with pink and white chalk paint then antiqued it a bit with some brown acrylic paint to give it shabby chic style. The adorable Half Scale Metal Tea Set sitting on the coffee table was painted with Vintaj Metal Patinas. I used Marble from the Painted Barn Set and Onyx from the Retro Highway Set. Here's an easy way to paint tiny things without making a mess:
I use long toothpicks, Loctite Mounting Putty (bought in the hardware section of Walmart) and a floral Styrofoam form to hold everything until dry and ready to use in my miniature scene. 
Lastly, there is the (another NEW thing!!) Half Scale Princess Table & Chairs Set. I modified my table by drilling a hole in the top and adding a cocktail umbrella that I painted (with chalk paint... love the stuff!).
The tiny book on the chair was made using an image from my latest collage sheet, Half Scale Books & Things Collage Sheet. The dog, cat, and cheese/wine tray are from a miniature store, but, you can buy the tiny wine bottle here.
Wow, that was a long post... I feel like I've been nattering on for ages! I hope I have inspired you to make your own brocante summer cottage or maybe a witches cottage or a garden shed or how about a fairy house... the possibilities are endless!
Thanks for stopping by and reading my post! It is much appreciated. If you would like to see a supplies list click here.


Wednesday, May 4, 2016

caged Alice...

Today, May 4th, is Alice Liddell's birthday. If you are an Alice in Wonderland fan, then you know who Alice L is... for those of you who don't know, she is the little girl who inspired Lewis Carroll to write Alice's Adventures in Wonderland. Alice L would have been 164 today if she had not died in 1934 at the ripe old age of 82. Anyway... in honor of Alice L's birthday I have created a silly version of the Queen's croquet ground... complete with hedgehog balls and flamingo mallets.
I used a wonderful shabby chic birdcage as the base of my croquet ground...
 then added a bit of moss...
some fussy cut collage images...
 some paper flowers and a wonderful resin-faced flower I painted with artist pastels...
then I topped it all off with a cute little hedgehog that's trying to escape the game ;)
If you'd like to create your own version of Caged Alice, you can find my supply list here.
Thanks for dropping in!

Saturday, December 5, 2015

white mice and Christmas...

 go together like black cats and Halloween... in my humble opinion. 
So I have been creating lots of Christmas art featuring mice. What could be cuter than a hidden drawer book box with a mouse perching among the holly?
 or a sweet, tiny, mouse warming his paws at the fireplace, inside the hidden drawer book box.
If you're not into cute and sweet, perhaps, a mouse driving a steampunk sleigh is more your style...
 Don't you just love that gorgeous plaid paper?
And just look at his little face!
Ooops! He's missing his whiskers because one of my cats thought they were fun to chew on. Bad, kitty :(
Speaking of the plaid paper... it's from a new company called Photo Play Paper Co. and we have some of their Dear Santa line at alphastamps.com. I fell in love with the kitschy mid century vibe and used some paper from the 6" x 6" pad to create this sweet shabby chic mini sleigh...
Dang! I forgot to put a mouse in that one! Oh, well, I guess I can add one to it later ;)
Thanks for dropping by and reading my post, if you'd like to view a list of supplies I used on each of these projects just click on the name below:
Christmas Mouse Book Box
Steampunk Mouse Sleigh

Sweet Shabby Chic Sleigh (below)