Showing posts with label vintage. Show all posts

Wednesday, May 2, 2018

tiny skyline sihouette book in a matchbox drawer...

I love this sweet new chipboard Matchbox Skyline Book from Alpha Stamps. It's the perfect size to knock out a quick, quirky art project in a couple of hours.
I used several different papers from Maps, Text & Ledgers 8x8 Paper Set as my base and as most of my collage images too (The images inside each tiny window are postage stamps from one of the papers in the set). The butterflies and the text "the pursuit of a paradox" are the only exceptions.
The tiny windows are from House Ornament Window Trims, and I darkened them with a brown stamp pad I had on my desk. I also used the pad to darken the edges of my paper for a grungy look.
 Although the skyline book has fold perforations, I cut mine apart after papering the front and back, because I wanted to put it back together using decorative tape, as I really love the way that adds to the grunge esthetic.
I used Diamond Stickles on the butterfly wings and added an adorable Small Brass Hitch Fastener to the matchbox drawer for a handle.
The whole project was finished in one afternoon as I listened to a favorite podcast. I find it so relaxing to make smaller creative projects using very few supplies when I've had a stressful week.
Thanks for reading this post. You can find my supply list here.

Saturday, February 3, 2018

Pussy Cat Theatre...

The new kit this month at Alpha Stamps is called Pink Valentine Theatre Kit. As a fan of the color pink I immediately fell in love with this kit and begged to make a sample! For said sample, I went back to my roots a bit and made a cat headed ballet theatre...
and it has lights!
The lights were so easy to add because the Punch & Judy Theatre (that I used as a base for my creation) has a lovely cubbyhole on the top, perfect for hiding your lighting controls.
I used a Mini String of Fairy Lights and hot glued them to the ceiling of the theatre and threaded the wire for the controller through a tiny hole in the ceiling so it could live in the cubbyhole.
You can just see the fairy lights in the photo above.
Here I am with my controller out ready to turn the lights on!
It looks so pretty all lit up!
If you're wondering how I got all of my scenery and dancers to stand up, here's my secret. After cutting out the pieces I wanted to use I glued them to 1/8 Inch Wooden Dowels then I made holes in the theatre floor, with a craft knife, where I wanted them go.
To keep them in place I used hot glue.
I think they look clean and uncluttered this way.
Thanks for stopping by and reading my ramblings. I hope you will try to create a theatre for yourself or a friend. If you're interested in the supplies I used, you can find them HERE.
Go make something!


Saturday, March 25, 2017

the memory keeper's room...

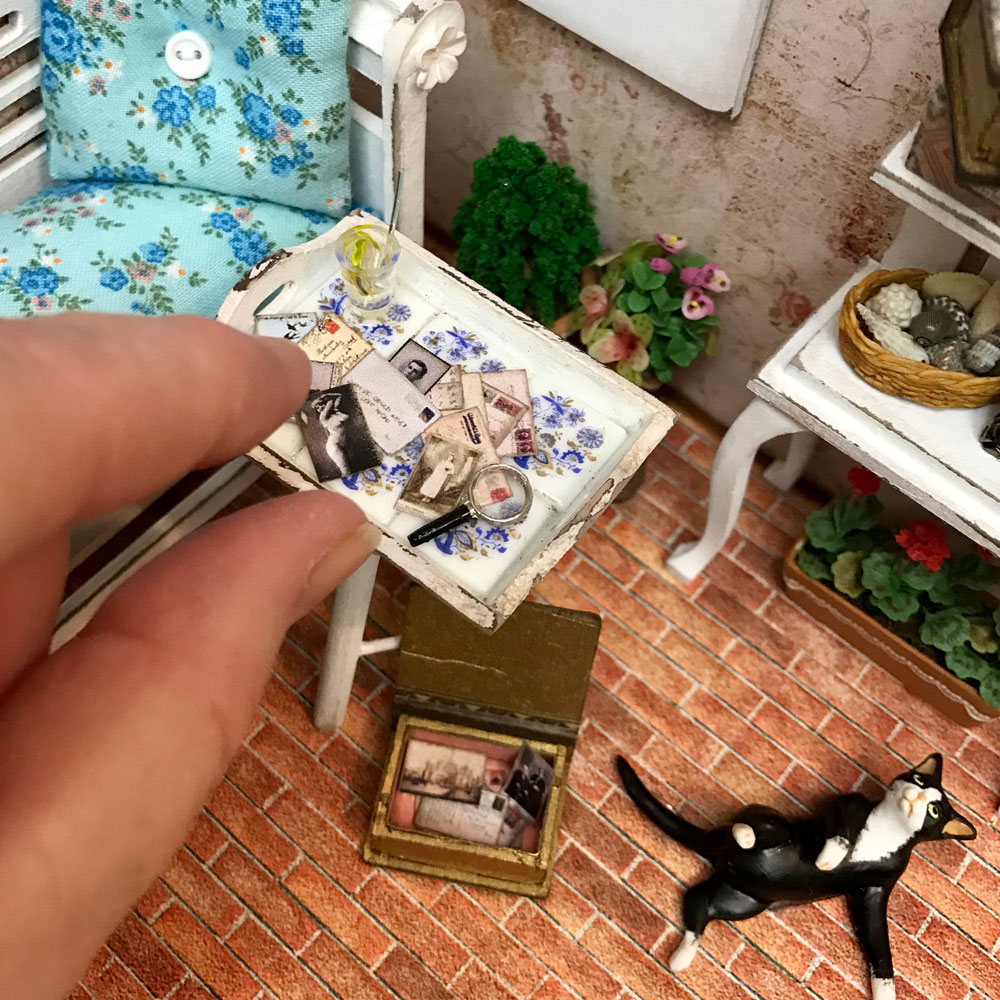
 This little shabby chic roombox is a tribute to all of you out there who collect vintage ephemera and photographs. I started collecting when I was a child because I spent a lot of time with my Great Grandmother, who was a collector. I still get a thrill when I find a particularly interesting old postcard or well worn love letter. The memories attached to these treasures may not be my own, but they still speak to me and inspire me to imagine a long past world so different from my own.
 As you can see, the focus of this room is the tray filled with old letters, postcards and photographs. There is even a magnifying glass for closer inspection. Below the tray is an open faux book box, with more photos and ephemera, waiting patiently for perusal. A couple more faux book boxes on the shelf await their turn as well.
 I felt this room really needed a window to look out of (while daydreaming) so I used a set of Dollhouse Windows with Shutters 1:12 to add one. The image I used behind the window wasn't quite tall enough to fill the whole window sooo... I made a decorative window shade out of a toothpick and some cardstock to hide it. I just glued the cardstock around the toothpick, added a piece of cardstock to the back so it hangs down and glued filigree beads to the ends. A small piece of white Dresden trim adds a finishing touch.
 I love cats, so I always try to put a cat or two (or three or four!) in any room box I make and this one is no exception. There's a mama cat and three kittens (who are really half scale cats that work purrfectly as kittens!)
I thank you for stopping by my blog and hope to see you again! Remember to take time to daydream and use your imagination :) Now run along and create something!
Supply list is available here.

Saturday, December 5, 2015

white mice and Christmas...

 go together like black cats and Halloween... in my humble opinion. 
So I have been creating lots of Christmas art featuring mice. What could be cuter than a hidden drawer book box with a mouse perching among the holly?
 or a sweet, tiny, mouse warming his paws at the fireplace, inside the hidden drawer book box.
If you're not into cute and sweet, perhaps, a mouse driving a steampunk sleigh is more your style...
 Don't you just love that gorgeous plaid paper?
And just look at his little face!
Ooops! He's missing his whiskers because one of my cats thought they were fun to chew on. Bad, kitty :(
Speaking of the plaid paper... it's from a new company called Photo Play Paper Co. and we have some of their Dear Santa line at alphastamps.com. I fell in love with the kitschy mid century vibe and used some paper from the 6" x 6" pad to create this sweet shabby chic mini sleigh...
Dang! I forgot to put a mouse in that one! Oh, well, I guess I can add one to it later ;)
Thanks for dropping by and reading my post, if you'd like to view a list of supplies I used on each of these projects just click on the name below:
Christmas Mouse Book Box
Steampunk Mouse Sleigh

Sweet Shabby Chic Sleigh (below)

Wednesday, June 3, 2015

Kitschy Bitch Television Shrine...


New and fabulous at www.alphastamps.com is the Altered Metal Frame - Television! I am in LOVE with this kitschy little shadowbox! It's the perfect shade of mid-century aqua and looks like an old TV with rabbit ears. I adore kitsch, so I begged Leslie to carry this frame from Prima Marketing just so I could create something totally over the top and tacky as all get out. I even created two new collage sheets for the occasion and dug up all the red and aqua treasures I could find in my hoarded stash.


 I think we can all agree the resulting shrine is pretty tacky, gaudy and lots of fun. It was also very easy to create as the back of the shadowbox opens up so you can easily apply paper and other decoration. My favorite thing about this piece is the letterpress letters that spell out kitschy along the top. I used some red acrylic paint on them to make them really pop.


If you'd like to create you own version of this "masterpiece" click here for a list of the supplies I used.
Thanks for stopping by and I hope you've enjoyed this little bit of kitsch.

Saturday, April 4, 2015

happy Easter...


Feel free to use the above vintage Easter image in your artistic endeavors and enjoy your day.